
Pruning
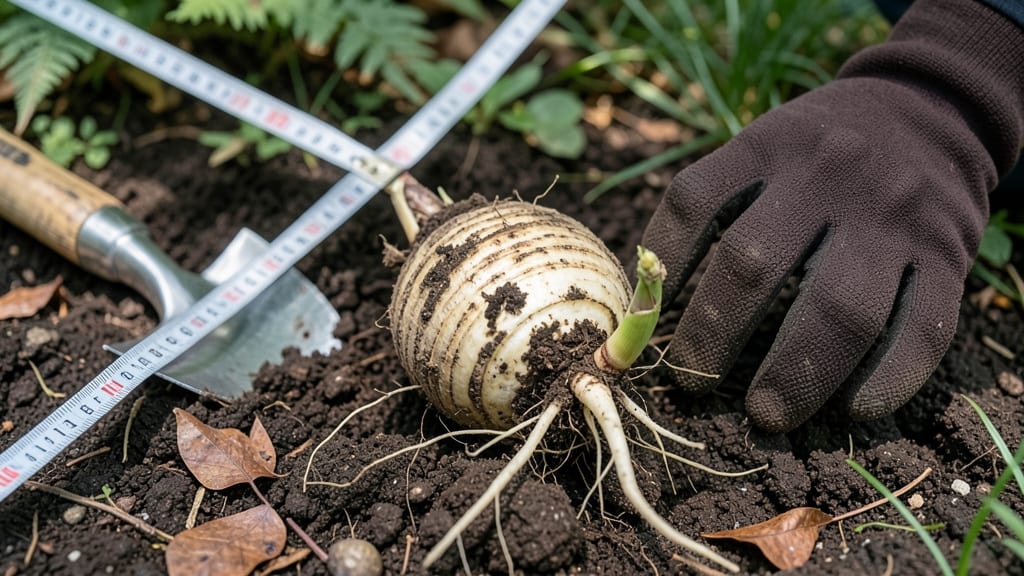
That banana corm in your hands holds the potential for a healthy, thriving banana tree—if you know how to handle it right. 🌱 I’ve learned the hard way that pruning and planting banana corms isn’t just about sticking them in the ground; it’s about timing, soil, and patience.
One wrong move, and you’ll end up with rot or stunted growth instead of lush fronds and sweet fruit.
The secret starts with the right conditions: warm soil, bright light, and just enough moisture to keep the corm plump but not soggy. Unlike growing from suckers or tissue culture, corms let you start fresh with a strong root system—if you give them what they need.
Most gardeners skip the prep work and wonder why their plants struggle, but the difference between a productive banana tree and a sad one often comes down to these early steps.
By the time you’re done, you’ll have a plant that grows faster, resists disease better, and even tolerates cooler nights once established. The key is cutting back old fronds at the right time (before they turn brown) and keeping the corm’s base dry.
Trust me, your future harvest will thank you for the effort.
Whether you’re growing outdoors in zones 10-12 or indoors under grow lights, the same principles apply—just adjust for your climate. Let’s get those corms planted the right way, so you’re not troubleshooting rot or slow growth later. Ready to turn that dormant corm into a fruit-bearing giant?
📚 In This Guide
- What you need
- Instructions
- Tips and common mistakes
- Wrapping up and next steps
What you need
- ● Pruning shears or loppers – Sharp, sterilized (for clean cuts; avoid dull tools that tear tissue).
- ● Gloves – Heavy-duty, cut-resistant (banana pseudostems have razor-sharp edges!).
- ● Disinfectant (70% isopropyl alcohol or bleach solution) – 1 part bleach to 9 parts water (to sterilize tools between cuts and prevent disease).
- ○ Pruning sealant (optional but helpful) – Pruning wax or tree paint (to seal large cuts and reduce sap loss).
- ● Compost or mulch – Well-aged, organic (to replenish soil nutrients post-pruning).
- ● Watering can or hose – With a gentle spray nozzle (for post-pruning hydration).
- ● Sturdy trash bags or bucket – For disposing of large pseudostem debris (compost small, healthy clippings).
- ● Timing: Prune during the dry season (when the plant is dormant) or after harvest to minimize stress. ⏰ Pro Tip: Avoid pruning during heavy rain or extreme heat!
- ● Weather: Choose a calm, overcast day to reduce sap bleeding and stress on the plant.
- ● Safety first!: Wear long sleeves and closed-toe shoes—banana corms can be heavy, and pseudostems are slippery when cut.
- ● Hand saw – For thick, woody pseudostems that shears can’t handle.
- ● Knee pads – If your banana tree is large and you’ll be kneeling often.
- ● Plant food (balanced fertilizer) – 10-10-10 or organic options (apply 4–6 weeks post-pruning to boost recovery).
- ● Camera or sketchbook – To document the corm’s structure before pruning (helpful for tracking growth!).
Instructions for pruning banana tree corms
Healthy banana trees start with proper corm care—here’s how to prune for stronger stems and bigger harvests.
🌱 Step 1: Identify and Remove Dead or Damaged Pseudostems
Banana trees grow from pseudostems—those thick, leafy stalks that look like trunks. Inspect each one for brown, mushy spots or hollow centers. These are dead or diseased and must go. I always start at the base and work upward, cutting 2-3 inches below the damage with a sterilized pruning shears.
Don’t cut into healthy tissue—you’ll see green, firm stems inside. If the pseudostem feels soft when pressed, it’s beyond saving. Remove it entirely to prevent fungal spread. Healthy pseudostems should feel solid and slightly fibrous when squeezed.
✂️ Step 2: Prune Old Fruit Stems After Harvest
Once your bananas are harvested, the empty stems (called "hands") turn brown and dry. These need to be trimmed back to 6-8 inches above the corm using sharp shears. Cut at a 45-degree angle to allow water to run off and prevent rot.
Leave the stubs—don’t cut all the way to the base. This protects the corm from pests and disease while still allowing new shoots to emerge from the center. I always sanitize my tools with rubbing alcohol between cuts to avoid spreading pathogens.
☀️ Step 3: Thin Overcrowded Shoots for Better Airflow
Banana trees produce multiple shoots from the corm, but too many compete for nutrients. Keep only 2-3 of the strongest, healthiest shoots per corm. To remove extras, cut them at the base with shears, leaving a ½-inch stub to prevent bleeding.
Watch for shoots growing at odd angles or with yellowing leaves—these are weak and should go first. Proper spacing ensures the remaining shoots get enough sunlight and air circulation, which reduces disease risk. Thin in the morning so cuts have time to dry before evening moisture sets in.
💧 Step 4: Fertilize and Water After Pruning
After pruning, give your banana tree a balanced fertilizer (like 10-10-10) mixed into the soil around the corm. This jumpstarts recovery and encourages new growth. Water deeply right after fertilizing to help nutrients absorb.
Keep the soil consistently moist but not soggy for the first 2-3 weeks post-pruning. You’ll see new shoots emerging within 4-6 weeks if conditions are right. If your climate is dry, mulch around the base to retain moisture and regulate temperature.
⏰ Step 5: Monitor for New Growth and Repeat Seasonally
Check your pruned corm every 2 weeks for signs of new shoots. Healthy growth looks like tight, green leaves emerging from the center. If you see yellowing or wilting, adjust watering or check for pests.
Repeat this pruning process every 6-12 months or when you notice overgrowth. Banana trees reward consistent care with larger fruit clusters and longer productivity. The key is balance—prune enough to encourage health, but not so much that you stress the plant.
Tips & tricks for pruning banana tree corms
Pruning banana trees might seem intimidating, but these simple tricks will help you avoid common mistakes and keep your plants thriving.
Tool Prep is Key: Before you start cutting, sterilize your pruning shears with rubbing alcohol—this prevents spreading fungal infections between cuts. I also recommend sharpening your blades first; dull tools crush stems instead of making clean cuts, which stresses the plant. A quick wipe-down with a disinfectant cloth between each cut adds an extra layer of protection.
Visual Cues for Healthy Tissue: In Step 1, when identifying dead pseudostems, look for the "thumb test"—press gently on the stem. Healthy tissue should feel firm and spring back slightly, while dead tissue will feel mushy or hollow. Another trick: cut open a questionable stem—healthy tissue inside is green and moist, while dead tissue is brown and dry. Don't hesitate to remove anything questionable!
Timing Matters for New Growth: The instructions mention checking for new shoots every 2 weeks, but here's the thing: morning is the best time to prune and monitor. Cuts made in the morning have all day to dry and callous over before evening moisture sets in, reducing rot risk. If you notice yellowing leaves during your 2-week checks, it's often a sign of overwatering or nutrient deficiency—adjust your care routine accordingly.
Optional: Mulching Boost: While not required, adding a 2-3 inch layer of organic mulch (like straw or wood chips) around the base after pruning helps retain moisture and regulate soil temperature. This is especially helpful in dry climates where you need to maintain that consistent moisture for 2-3 weeks post-pruning. Just keep the mulch a few inches away from the corm itself to prevent rot.
Pro Tips for Banana Tree Corm
- Pruning banana trees might seem intimidating, but these simple tricks will help you avoid common mistakes and keep yo...
- Tool Prep is Key: Before you start cutting, sterilize your pruning shears with rubbing alcohol—this prevents spreadin...
- Visual Cues for Healthy Tissue: In Step 1, when identifying dead pseudostems, look for the "thumb test"—press gently ...
Frequently asked questions
Got questions about your banana tree corm? You’re not alone! Here are some of the most common concerns—plus quick, actionable answers to keep your plant thriving.
What is a banana tree corm, and why does it matter?
The corm is the thick, underground stem of a banana plant that stores nutrients and energy. Pruning or managing it properly ensures healthy regrowth and fruit production. Without a healthy corm, your plant may struggle to recover after harvest or survive harsh conditions.
When is the best time to prune the corm?
Prune the corm after the plant has fruited and the fruit bunch has turned yellow (or been harvested). This is typically 3–6 months after flowering, depending on your climate. Avoid pruning during active growth or flowering—it stresses the plant and reduces yields.
What if my banana tree’s corm rots or smells bad?
Rotting or foul-smelling corms signal overwatering, poor drainage, or fungal/bacterial infections. Act fast: Trim away mushy areas with a sterilized knife, treat with copper fungicide, and repot in fresh, well-draining soil. Reduce watering until the corm stabilizes—prevention is key!
Can I grow a new banana tree from a corm cutting?
Yes! After pruning, save healthy corm sections (at least 2–3 inches thick) with at least one "eye" (growth node). Let them dry for 1–2 days, then plant in moist soil, 2–3 inches deep. Keep soil warm (70–85°F) and humid for best success—new shoots should sprout in 2–4 weeks!
How often should I prune my banana tree’s corm?
Healthy banana trees only need one major prune per cycle (post-harvest). Light trimming of dead leaves or suckers (shoots) can happen year-round, but avoid over-pruning—the corm needs energy to regenerate. Overzealous cuts can weaken the plant and delay fruiting.
Wrapping up and next steps
Mastering the art of pruning your banana tree corm is your ticket to a thriving plant and a bountiful harvest! 🌱 By following the right techniques—like removing dead leaves, thinning suckers, and protecting the corm—you’re setting the stage for stronger growth and healthier fruit.
Remember, consistency is key, and soon you’ll be rewarded with lush foliage and delicious bananas.
Ready to take the next step? Start small—practice on one section of your banana tree, observe how it responds, and gradually apply what you’ve learned. Happy pruning, and here’s to a fruitful future! 🍌✨