
Pruning
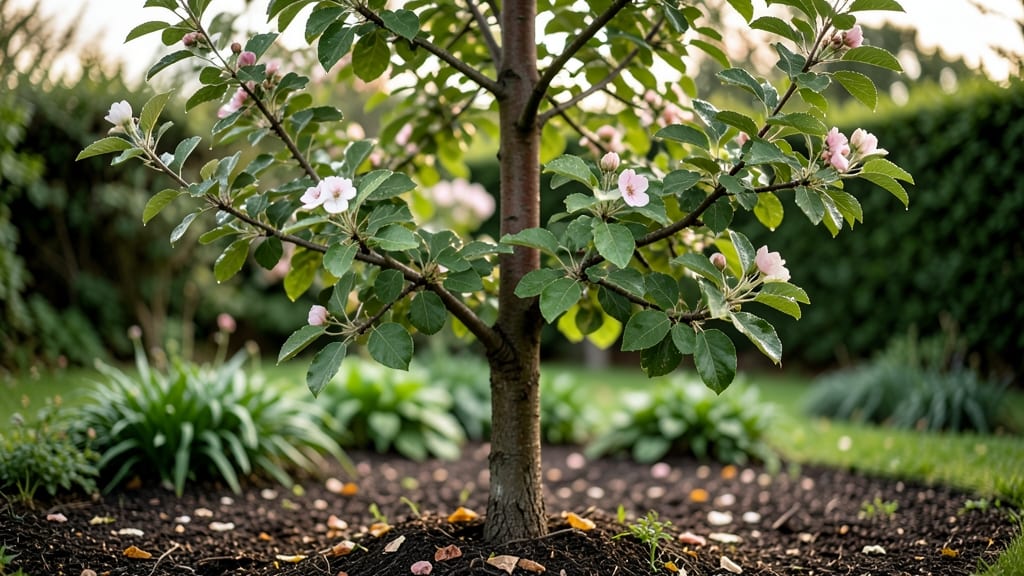
Your apple tree’s future shape starts with the central leader pruning method—the secret to a strong, productive tree that outgrows common mistakes. 🌳 I’ve trained over a dozen apple trees this way, and the difference in fruit quality and structure is night and day.
The key? Pruning at the right time and in the right way to keep that single dominant trunk strong while encouraging branches to spread naturally.
This system isn’t just about cutting branches—it’s about guiding growth. You’ll need sharp pruners, a ladder (for taller trees), and a clear vision of your tree’s future shape. The first year is critical: focus on removing competing leaders and any branches growing inward or crossing others.
By winter, you’ll see a single, sturdy trunk with well-spaced scaffold branches ready to bear fruit.
What you’ll end up with is a tree that produces heavier, higher-quality fruit while resisting disease and storm damage. The central leader stays dominant, and side branches develop strong angles for better sunlight exposure. Plus, pruning becomes easier as the tree matures—no more wrestling with tangled branches or weak forks.
Works for both dwarf and standard apple varieties, and adapts to urban yards or rural orchards. The best part? You can start this method with a young tree or even correct an older one’s shape over time. Let’s get those branches in line!
📚 In This Guide
- What you need
- Instructions
- Tips and common mistakes
- Wrapping up and next steps
What you need
- ● Pruning shears (bypass or anvil type) – Sharp, clean blades (10-12" length) for clean cuts.
- ● Loppers – For thicker branches (1.5-2.5" diameter)—look for bypass-style for precision.
- ● Pruning saw – For branches too thick for loppers (3"+ diameter).
- ● Disinfectant (70% isopropyl alcohol or pruning sealant) – Prevents disease spread between cuts.
- ● Gloves (gardening or pruning-specific) – Thick, cut-resistant material (e.g., leather or reinforced fabric).
- ● Ladder or step stool – Reach higher branches safely (extendable or sturdy 6-8 ft).
- ○ Twine or tree ties (optional but helpful) – For securing scaffold branches if needed.
- ● Pruning paint or wound dressing – For large cuts (controversial but useful for sealing cuts >2" diameter).
- ● Work apron with pockets – Keep tools and debris contained.
- ● Notepad & pen – Sketch a quick pruning plan or note branch sizes.
- ● Safety glasses – Protects eyes from debris (especially when using a saw).
- ● Know your apple tree variety – Some (like ‘Honeycrisp’) respond better to central leader pruning than others.
- ● Check the tree’s age and maturity – Young trees (1-5 years) need light pruning; mature trees may need structural adjustments.
- ● Pick the right season – Late winter/early spring (dormant season) is ideal for major pruning.
- ● Review basic pruning principles – Know how to make clean cuts (just outside the branch collar) and avoid topping.
Step-by-step instructions for apple tree central leader pruning
Here's how to maintain that perfect central leader shape while keeping your apple tree thriving.
✂️ Step 1: Identify and Mark Key Branches
Start by examining your tree's central leader—the main vertical stem. Look for branches growing at angles wider than 45 degrees from the trunk or those longer than 1/3 the length of the leader. These are your primary candidates for pruning. I like to use a white marker to tag branches that need attention—it's easier to spot them later when the tree is fully leafed out.
Pay special attention to branches that cross or rub against the central leader. These create wounds that invite disease. If you see any dead, diseased, or broken branches, mark those first—they're always the priority. The goal here is to create an open center that allows sunlight and air to circulate freely through the canopy.
✂️ Step 2: Prune at the Right Time and Angle
For central leader pruning, late winter or early spring—just before buds swell—is ideal. This timing lets you see the tree's structure clearly while it's still dormant. When making cuts, aim for a 45-degree angle, cutting just above an outward-facing bud. This ensures new growth will continue the branch's natural outward direction rather than growing straight back into the center.
Never cut more than 25% of the tree's canopy in one season. For young trees, that might mean removing just one or two branches. Over-pruning stresses the tree and can reduce fruit production. I always make my cuts just outside the branch collar—the swollen area where the branch meets the trunk—to promote faster healing.
☀️ Step 3: Maintain Open Center and Balance
After removing the marked branches, step back and evaluate the tree's shape. The central leader should remain dominant, with no competing vertical stems. If you see another stem growing straight up that's nearly as thick as your leader, you'll need to prune it back to a lateral branch. This keeps the tree's energy focused on one strong central stem.
Look for any branches growing inward toward the center. These shade out the interior and reduce fruit production. Cut them back to an outward-facing bud. The final shape should resemble an upside-down cone, with the widest part at the top and the trunk tapering to a single leader. This shape maximizes sunlight exposure and air circulation throughout the canopy.
🌿 Step 4: Post-Pruning Care and Monitoring
After pruning, clean your tools with rubbing alcohol to prevent disease spread. Then, apply a thin layer of pruning sealant to cuts larger than 1/2 inch in diameter. For smaller cuts, let the tree seal itself naturally—sealant can actually trap moisture and promote rot on small wounds. Water the tree deeply after pruning to help it recover from the stress.
Monitor the tree throughout the growing season. If you notice any new branches growing at sharp angles or competing with the central leader, mark them for next year's pruning. The first few years after pruning are critical—this is when the tree establishes its permanent structure. Be patient and avoid heavy pruning in subsequent years unless absolutely necessary.
Tips & tricks for perfect apple tree central leader pruning
Here's what nobody tells you about keeping your apple tree healthy while shaping that ideal central leader.
Angle Accuracy Matters: When making those 45-degree cuts in Step 2, use a small mirror or reflective surface to check your angle from below. I've found that holding the branch at exactly 45 degrees from the trunk (not the ground) ensures proper outward growth. The mirror helps verify you're not cutting too steeply or too shallowly—both mistakes can lead to branches growing back into the center.
Marking System Upgrade: Instead of just using a white marker, I recommend adding colored tape to your pruning shears. Attach a small piece of red tape to the blade—this creates a visual guide for where to make your cuts. The tape aligns perfectly with your 45-degree angle, making it easier to cut just above that outward-facing bud every single time. It's a small upgrade that eliminates guesswork.
Seasonal Timing Secret: While late winter/early spring is ideal, you can actually do light pruning throughout the year—just avoid summer. In fall, you can remove dead or diseased branches to prevent winter diseases from spreading. The key is to never remove more than 25% of the canopy in any season, even if you're doing multiple light prunings. This maintains the tree's energy balance year-round.
Tool Sanitation Shortcut: After pruning, I keep a small spray bottle of 70% rubbing alcohol mixed with water (1:1 ratio) in my tool bag. A quick spray on your shears between cuts prevents disease spread more effectively than wiping alone. For larger cuts, I also keep a pack of sterile cotton swabs to dab on wounds immediately after cutting—this helps prevent bacterial infections before they start.
Pro Tips for Apple Tree Central Leader
- Here's what nobody tells you about keeping your apple tree healthy while shaping that ideal central leader.
- Angle Accuracy Matters: When making those 45-degree cuts in Step 2, use a small mirror or reflective surface to check...
- Marking System Upgrade: Instead of just using a white marker, I recommend adding colored tape to your pruning shears....
Frequently asked questions
Got questions about mastering the apple tree central leader pruning technique? You’re not alone! Here are some of the most common concerns—plus clear, actionable answers to keep your tree thriving.
What’s the best time of year to prune an apple tree using the central leader method?
The ideal window is late winter or early spring (just before buds swell), when the tree is dormant but growth is about to resume. Avoid pruning in fall—it can leave wounds vulnerable to disease. Pro tip: If you must prune in summer, do it after harvest to minimize stress on the tree.
How do I know if my apple tree’s central leader is too weak or damaged?
Look for these red flags:
- Splitting or cracking at the base or along the trunk.
- Multiple leaders competing for dominance (more than one upright branch).
- Dead or dying wood (brown, brittle, or no leaves in spring).
Can I still use the central leader method if my apple tree is already mature?
Yes, but with caution! Mature trees often have thick canopies and multiple leaders. Start by thinning out competing branches to re-establish a single central leader. Focus on removing water sprouts and crossing branches first. For heavy canopies, consider gradual pruning over 2–3 years to avoid shock.
What if my apple tree keeps growing multiple leaders instead of one central leader?
This is common in young trees! To fix it:
- Select the strongest, straightest leader (usually the most upright and thickest).
- Prune the others back to a lateral branch or bud, leaving a stub (not a flush cut).
- Use ties or stakes to guide the chosen leader upward if needed.
Should I prune my apple tree’s central leader after a harsh winter or storm damage?
Act fast
to remove broken, diseased, or frost-damaged branches. For storm damage, cut back to the collar (the swollen area where the branch meets the trunk) to promote faster healing. If the central leader is severely damaged, select a strong lateral branch to train as the new leader. Time is critical: Prune within a few weeks to prevent pests or disease entry.
Wrapping up and next steps
Mastering the apple tree central leader pruning technique is your ticket to a strong, productive, and beautifully shaped tree year-round! 🍏 By focusing on strategic cuts, seasonal timing, and proper tools, you’ll balance growth and structure while keeping your tree healthy and fruitful.
Remember, consistency is key—small, thoughtful adjustments will yield big rewards over time.
Ready to take the next step? Start with a single branch this season, observe how your tree responds, and gradually refine your approach. Happy pruning—your future harvests will thank you! 🌱