
Pruning
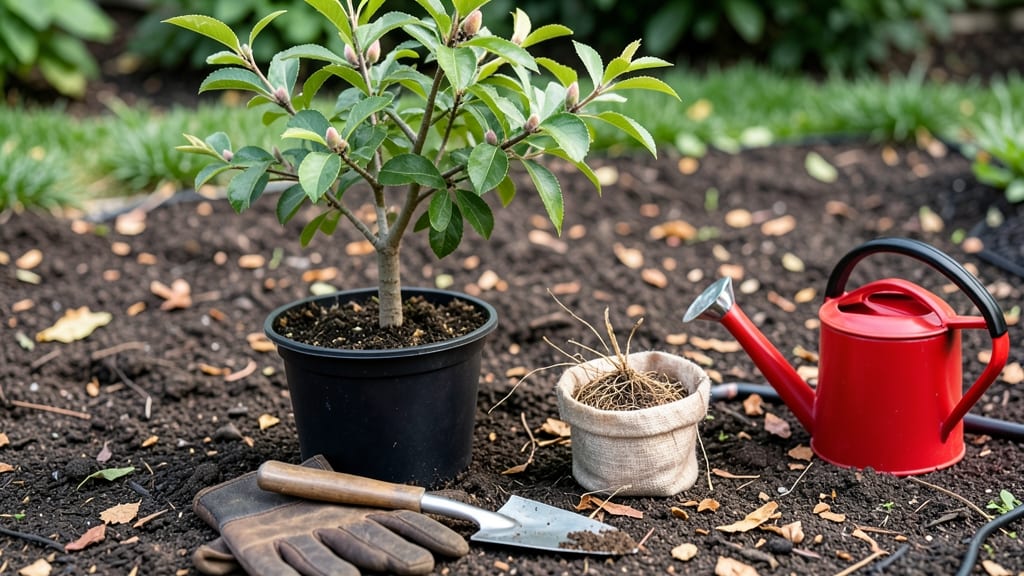
Starting a peach tree starter from cold-stratified sprouts means you'll have a thriving young tree ready for planting in just 4 weeks—no nursery waitlist required. 🌱 I learned the hard way that skipping this step leads to weak, leggy seedlings that struggle in the ground.
The secret? Mimicking winter's chill period right in your fridge before transplanting. You'll need a well-draining mix of potting soil and perlite, a clear plastic bag for humidity, and a patient eye for the right moment to move them outside.
Most beginners overwater during this phase, but keeping the soil lightly moist—not soggy—is what makes the difference between success and disappointment. That first flush of true leaves tells you everything's on track. By the time you plant your sprouts, they'll already be 3-4 inches tall with strong root systems.
The key milestones after planting are watching for new growth in 2-3 weeks and avoiding the temptation to over-fertilize—your tree's energy should go into roots, not leaves. I've seen sprouts I started this way outperform nursery plants by their second year.
This method works for any peach variety and adapts to containers if space is tight. The payoff? Homegrown fruit in 3-4 years instead of 5, with trees that resist common nursery-bought weaknesses. Let's get those sprouts growing!
📚 In This Guide
- What you need
- Instructions
- Tips and common mistakes
- Wrapping up and next steps
What you need
- ● Peach tree seeds – Fresh, high-quality seeds (or pitted peaches from a reliable source). Aim for at least 10 seeds to account for germination variability.
- ● Cold-stratification medium – A mix of: 50% moist peat moss or coconut coir (for moisture retention)
- ● 50% perlite or coarse sand (for aeration)
- ● Plastic storage bag or airtight container – A quart-sized zip-top bag or small Tupperware with ventilation holes (poke 2–3 small holes with a needle).
- ● Refrigerator space – A consistent 34–40°F (1–4°C) environment for stratification.
- ● Small pots or seed trays – 3–4 inch diameter pots with drainage holes (or a seed tray with individual cells).
- ● Potting soil – A well-draining, sterile mix (e.g., 60% peat moss, 30% perlite, 10% compost).
- ● Spray bottle – For gentle watering to keep the medium moist.
- ● Grow lights or sunny windowsill – A south-facing window or LED grow lights (12–16 hours of light/day) once sprouts emerge.
- ● Seedling heat mat – Speeds up germination if your home runs cool (70–75°F / 21–24°C ideal).
- ● Humidity dome or plastic wrap – Keeps moisture locked in during early growth.
- ● pH testing kit – Ensures your potting soil is in the 6.0–6.8 range (peach trees prefer slightly acidic soil).
- ● Fertilizer (low-nitrogen) – A balanced 10-10-10 or 5-10-10 formula once sprouts have 2–3 true leaves.
- ● Pruning shears – For trimming leggy sprouts or future pruning.
- ● Label markers – To track seed varieties and planting dates!
Step-by-step guide to cold-stratifying peach tree seeds
Here’s how to break dormancy and coax peach seeds into sprouts in just four weeks.
🌱 Step 1: Harvest and Clean the Seeds
Collect fully ripe peaches and scoop out the pits—never use store-bought seeds, as they’re often treated to prevent germination. Rinse the pits thoroughly under cool water to remove all fruit residue, then pat them dry with a paper towel. The cleaner the seed, the faster it’ll break dormancy.
I like to soak the pits in a bowl of water for 24 hours to soften the outer shell slightly. This helps the seedling taproot push through more easily later. After soaking, let them air-dry completely for 12 hours before stratification—moisture trapped inside will cause rot during cold treatment.
💧 Step 2: Prepare the Cold Stratification Setup
Fill a quart-sized resealable plastic bag with 1 inch of moistened perlite or vermiculite—these materials hold moisture without compacting. Place the dried peach pits inside, spacing them 1 inch apart to prevent mold. Seal the bag loosely (leave a tiny gap for airflow) and label it with the date.
Store the bag in your refrigerator’s crisp drawer (around 35-40°F), where humidity stays high and temperatures remain stable. Check weekly—if the medium feels damp but not soggy, you’re good. If it smells musty or feels clammy, open the bag for 24 hours to air out before resealing.
☀️ Step 3: Monitor for Germination Cues
After 2-3 weeks, tiny white roots (1/4 inch long) will emerge from the pits. This is your signal to move them to a warm, bright spot (around 65-70°F). I transfer them to a shallow tray lined with damp paper towels—just enough moisture to keep the roots hydrated without drowning them.
Watch for the first true leaves (not the initial seed leaves) to appear in 1-2 weeks. Once they do, plant each seedling in its own 3-inch biodegradable pot filled with sterile seed-starting mix. Press the soil gently around the roots—don’t bury the seed too deep, or the stem will rot.
⏰ Step 4: Transition to Growing Conditions
Place the pots under a grow light (12-14 hours daily) or in a south-facing window where they’ll get 6+ hours of indirect light. Peach seedlings are sensitive to heat—keep them away from radiators or vents. Water when the top inch of soil feels dry, using room-temperature water to avoid shocking the roots.
After 4 weeks, when seedlings reach 4-6 inches tall, they’re ready for outdoor hardening. Start by setting them outside in partial shade for 1 hour daily, gradually increasing exposure over 10 days. By late spring, they’ll be tough enough to transplant into the ground—just dig a hole twice as wide as the root ball and amend the soil with compost.
Tips & tricks for perfect peach tree starters
These practical insights will help you maximize your peach seed germination success without the common pitfalls.
Seed Selection Matters: Choose pits from fully ripe, locally grown peaches when possible—they often have higher germination rates. I've found that heirloom varieties tend to perform better than commercial ones. If you're using store-bought peaches, select organic when available to avoid potential chemical treatments that might inhibit germination. The fresher the fruit, the better your starting point!
Stratification Environment: The refrigerator's crisp drawer maintains the ideal 35-40°F range for stratification, but if you don't have one, the main fridge body works too. What's critical is consistency—avoid placing near the freezer door where temperatures fluctuate. I've had success using a dedicated seed stratification box in the fridge if you're working with multiple seed types simultaneously. The key is maintaining that stable cold temperature for the full 2-3 weeks.
Germination Monitoring: When checking for those 1/4-inch white roots after 2-3 weeks, do it gently to avoid damaging the delicate taproot. I use a small flashlight to inspect the pits—this helps me spot early signs without disturbing the medium. Remember that some pits may germinate faster than others, so be patient and check regularly. The moment you see that first root, it's time to move to warmer conditions immediately to prevent over-chilling.
Lighting Strategy: For the 12-14 hours of daily light, grow lights are ideal but not mandatory. A south-facing window with 6+ hours of indirect light works well too, though you may need to rotate pots occasionally for even growth. I've found that LED grow lights with full spectrum capabilities provide the best results for young seedlings. Just be mindful not to let the seedlings touch the light source—keep them about 2-3 inches away to prevent scorching.
Pro Tips for Peach Tree Starter
- These practical insights will help you maximize your peach seed germination success without the common pitfalls.
- Seed Selection Matters: Choose pits from fully ripe, locally grown peaches when possible—they often have higher germi...
- Stratification Environment: The refrigerator's crisp drawer maintains the ideal 35-40°F range for stratification, but...
Frequently asked questions
Got questions about growing a peach tree from a cold-stratified sprout? We’ve got answers! Here are some of the most common concerns—plus quick fixes and pro tips to set you up for success.
How long does cold stratification take for peach tree seeds?
Cold stratification for peach seeds typically takes 4–6 weeks in the fridge (34–40°F). For this starter method, we’re using pre-stratified sprouts, so you can bypass the waiting game! Just plant them in well-draining soil once the last frost has passed (usually late spring). Pro tip: If your sprouts are dormant, a quick soak in warm water for 12 hours can jumpstart germination.
Can I speed up the sprouting process?
While cold stratification is essential for breaking dormancy, you can’t rush it without risks. However, once sprouts emerge, keep them in a warm, humid environment (70–75°F) with indirect light to encourage faster growth. Avoid direct sunlight until they’re transplanted—too much heat can stress tender sprouts. Pro tip: A clear plastic dome over the pot mimics a greenhouse effect!
What’s the best soil mix for peach tree starters?
Peach trees thrive in well-draining, slightly acidic soil (pH 6.0–7.0). Mix equal parts potting soil, perlite, and compost for optimal aeration and nutrients. Avoid heavy clay or waterlogged soil—root rot is a common killer of young starters. Pro tip: Add a handful of egg shells (crushed) for calcium to boost cell wall strength!
Why are my peach tree sprouts turning yellow or wilting?
Yellowing leaves often signal overwatering or nutrient deficiency. Check the soil—it should stay moist but not soggy. Wilting can also mean underwatering or root stress. Adjust your watering schedule (every 2–3 days) and ensure pots have drainage holes. Pro tip: Yellow lower leaves? It’s normal as they age—focus on new growth!
Can I grow a peach tree from a grocery store peach?
Yes, but with a caveat: Store-bought peaches are often treated to prevent sprouting. Try seeds from organic, heirloom, or locally grown peaches instead. If you’re experimenting, soak seeds in warm water for 24 hours, then cold-stratify them for 6–8 weeks. Pro tip: Save seeds from ripe, fully colored peaches—green ones won’t sprout!
Wrapping up and next steps
Starting your own peach tree from cold-stratified sprouts in just four weeks is an incredibly rewarding process—one that connects you to nature’s cycle and yields delicious fruit in the future! 🌱 With the right materials, patience, and a little care, you’ve got everything you need to kickstart this journey.
Now that you’re armed with knowledge, take the next step: gather your supplies, follow the steps, and watch those sprouts transform into a thriving peach tree!
Ready to grow? Your future harvest starts today! 🍑