
Landscaping
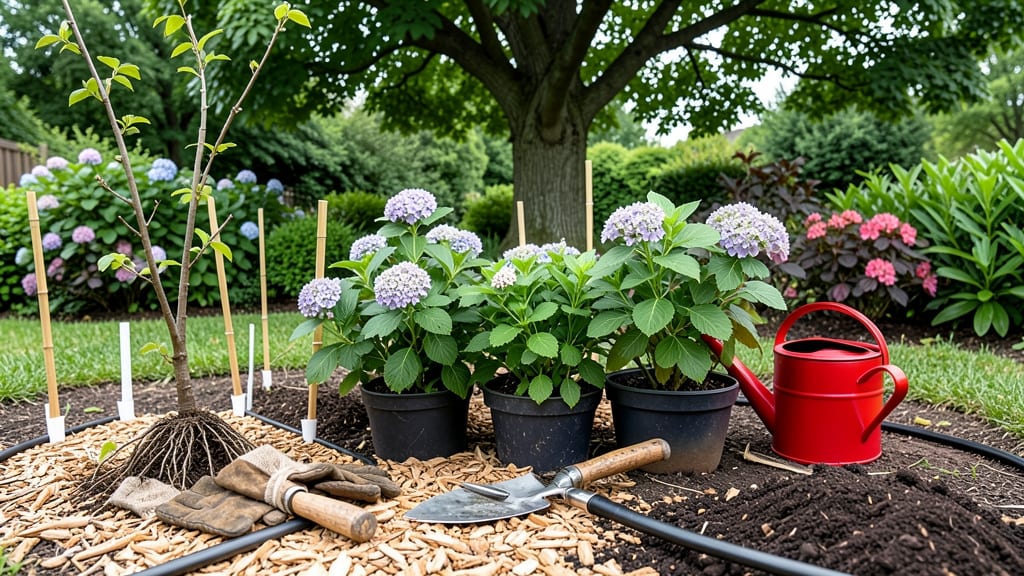
Strategic landscape tree and shrub planting turns a yard into a living privacy screen that changes with the seasons. 🌿 I learned the hard way that cramming plants too close creates a tangled mess—until I mapped out mature sizes and spaced them properly.
The result? Year-round coverage from winter evergreens to summer blooms, with no gaps or maintenance headaches.
Start by measuring mature widths, not just the small nursery plants. A 10-foot shrub needs 8-10 feet of space to grow without competing with neighbors, while trees should have 15-20 feet of clearance.
Pair fast-growing evergreens like arborvitae with slower deciduous trees like maple for layered privacy that never looks flat.
You'll end up with a landscape that blocks noise, filters wind, and looks intentional—not crowded. The key is balancing sun-loving plants with shade-tolerant varieties, so every spot gets the right plant.
Mulch heavily to retain moisture and suppress weeds, then step back to admire how the layers create depth over time.
Works for any yard size, from tight urban lots to spacious rural properties. The same principles apply whether you're planting a single focal tree or a full hedge line. Here's how to get the spacing right from day one.
📚 In This Guide
- What you need
- Instructions
- Tips and common mistakes
- Wrapping up and next steps
What you need
- ● Trees & Shrubs: Choose 3–5 species (e.g., evergreens like Thuja occidentalis or Ilex crenata for privacy). Calculate 1–3 plants per 10 sq. ft. based on mature size.
- ● High-quality soil: 50–100 lbs of compost or topsoil (amend native soil if clay-heavy).
- ● Mulch: 2–3 cubic yards of organic mulch (e.g., wood chips or pine straw) for moisture retention.
- ● Fertilizer: Slow-release balanced fertilizer (10-10-10 or 20-20-20) or organic options like fish emulsion.
- ○ Plant supports (optional): Burlap-wrapped stakes or spiral ties for young, tall shrubs.
- ● Digging tools: Shovel (flat-edged for planting, round-point for digging).
- ● Hoe or spade for soil prep.
- ● Trenching shovel (if planting in rows).
- ● Measuring & layout: Tape measure (25+ ft).
- ● Stakes & string for marking spacing.
- ● Wheelbarrow (for hauling soil/mulch).
- ● Watering: Garden hose with soaker hose or watering wand.
- ○ Safety gear (optional but recommended): Gloves, knee pads, and dust mask for soil.
- ● Site assessment: Test soil pH (ideal: 6.0–7.0 for most plants) and sunlight exposure.
- ● Local regulations: Check HOA rules or native plant restrictions (some areas prohibit invasive species).
- ● Weather window: Plant in early spring or fall (avoid extreme heat/cold).
- ● Budget: Allocate $50–$500+ per plant (depending on size/species).
Instructions for strategic tree and shrub planting
Here's how to plant for long-term privacy—where spacing and placement make all the difference.
🌱 Step 1: Map Your Layout Before Digging
Sketch your property with key features marked: walkways, driveways, utility lines, and existing structures. I use graph paper with each square representing 1 foot to scale the mature size of each plant. For example, a 20-foot-tall tree needs 15 feet of clearance from sidewalks and 25 feet from buildings to avoid root conflict.
Group plants by their growth habits—fast-growing shrubs like arborvitae for quick privacy, medium-height plants like hydrangeas for mid-layers, and tall trees like maples for the back. This creates natural tiers that block views at all heights. I always leave 3-5 feet between shrubs of the same species to allow airflow and reduce disease risk.
🪴 Step 2: Dig Holes with Precision
Use a spade or augur to dig holes twice as wide as the root ball but no deeper. The top of the root ball should sit 1-2 inches above ground level—this prevents settling and potential girdling as soil compacts. If your soil is heavy clay, amend the hole with 2-3 inches of compost mixed into the bottom third to improve drainage.
Step back and check the hole depth with a level—the sides should be straight, not sloped, so roots spread evenly. For larger trees, I rent a post-hole digger to save my back and ensure clean, vertical walls. The hole should be just snug enough for the root ball; forcing it in damages roots and stresses the plant.
☀️ Step 3: Position Plants for Optimal Growth
Place each plant so its strongest side faces the area you want to screen—this creates an instant visual barrier. For example, if planting a 10-foot-tall arborvitae to block a neighbor’s driveway, position it so the densest foliage side points toward the view. Stake only if the plant is taller than 6 feet or in windy areas; otherwise, staking can restrict root growth.
Fill the hole with native soil, tamping gently in 2-inch layers to eliminate air pockets. Water deeply after planting to settle the soil and encourage root contact. I always add a 2-inch layer of mulch (not touching the trunk) to retain moisture and suppress weeds—just enough to cover the root zone but not smother the plant.
⏰ Step 4: Water and Monitor Early Growth
Water deeply every 2-3 days for the first 2 weeks, then taper to once a week once new growth appears. Overwatering at this stage causes root rot, while underwatering stresses the plant. You’ll know moisture is right when the top 2 inches of soil feel damp but not soggy.
Check for wilting or yellowing leaves in the first 3-4 weeks—these are signs of transplant shock. If you see this, water more frequently and provide light shade during peak afternoon sun. Avoid fertilizing for the first 6-8 weeks; new plants need time to establish roots before competing with nutrient uptake.
✂️ Step 5: Prune for Structure and Health
Prune only to remove dead, broken, or crossing branches in the first year—never to shape. Use clean, sharp pruners to make cuts just outside the branch collar (the swollen area where the branch meets the trunk). For shrubs, I trim back 1/3 of the new growth in late winter to encourage bushier growth, but never more than that in a single season.
Watch for signs of stress like leaf curl or brown tips—these often indicate overpruning or pest activity. If you notice pests, treat with neem oil or insecticidal soap early to prevent infestations. The key is patience; a well-planted shrub or tree will fill in beautifully over 3-5 years with minimal intervention.
Tips & tricks for perfect landscape tree and shrub planting
Took me years of trial and error to perfect these planting strategies—here's how to avoid my mistakes and create a thriving privacy screen that lasts decades.
Plant Placement Strategy: In Step 1, when mapping your layout, consider the mature height and spread of each plant—not just their current size. A 10-foot arborvitae will need 8-10 feet of horizontal space by maturity, so plan accordingly. I like to draw a 3D sketch showing how the plants will fill in over time, which helps visualize the final privacy effect. This prevents overcrowding and ensures you're not planting trees too close to structures.
Soil Preparation Pro Tip: Before digging holes in Step 2, test your soil's drainage by digging a 12-inch deep hole and filling it with water. If it drains completely in 2 hours, your soil is well-draining. If water remains after 4 hours, amend with 1 part sand to 2 parts native soil in the bottom of each planting hole. This simple test saves you from waterlogged roots later.
Root Ball Handling: When removing plants from containers in Step 2, gently squeeze the sides to loosen the root ball—this encourages roots to spread outward rather than circling. If you're planting bare-root trees, soak the roots in water for 1-2 hours before planting to prevent drying out. Never force a plant into its hole; if it doesn't fit easily, the hole needs to be larger.
Mulching Mastery: After planting in Step 3, apply mulch in a 3-inch diameter circle around each plant, keeping it 6 inches away from the trunk. Too much mulch suffocates roots, while too little fails to suppress weeds. I use wood chips or shredded bark because they break down slowly, providing long-term moisture retention. Refresh the mulch layer annually in late winter.
Pro Tips for Landscape Tree And Shrub Planting
- Took me years of trial and error to perfect these planting strategies—here's how to avoid my mistakes and create a th...
- Plant Placement Strategy: In Step 1, when mapping your layout, consider the mature height and spread of each plant—no...
- Soil Preparation Pro Tip: Before digging holes in Step 2, test your soil's drainage by digging a 12-inch deep hole an...
Frequently asked questions
Got questions about planting trees and shrubs for privacy? You’re not alone! Here are some of the most common concerns—and their straightforward answers—to help you plan with confidence.
What’s the best spacing for privacy trees and shrubs?
Spacing depends on the plant’s mature size. Fast-growing trees like Leyland cypress need 6–8 feet apart, while slower shrubs (e.g., boxwood) can be planted 3–4 feet apart. Check the plant tag or consult local guidelines to avoid overcrowding or gaps as they grow.
When is the ideal time to plant trees and shrubs for privacy?
The best times are early spring (before buds swell) or fall (6 weeks before frost). These seasons give plants time to establish roots without extreme heat or cold. Avoid planting in summer (stress from heat/drought) or winter (frozen soil).
Can I use evergreens and deciduous plants together for privacy?
Evergreens (like arborvitae) provide year-round coverage, while deciduous shrubs (e.g., hydrangeas) add seasonal color and fill gaps when evergreens thin. Just ensure the deciduous plants won’t outcompete evergreens for sunlight or water.
How do I fix overcrowded or unevenly spaced plants?
Start by pruning overgrown plants to reduce density, then thin out the weakest or smallest specimens. For new plantings, space them correctly from the start—it’s easier than retrofitting! Mulch heavily to protect roots during adjustments and water deeply to help recovery.
Are there low-maintenance alternatives to traditional privacy hedges?
Yes! Consider native plants (e.g., holly, elderberry) or dwarf conifers for less pruning. Bamboo screens (non-invasive clumping types) or ornamental grasses (like pampas grass) also offer texture with minimal upkeep. Always research local climate suitability!
| Quick Tip | Action |
|---|---|
| Label everything! | Use stakes to mark plant types and spacing—especially helpful if you hire help later. |
| Soil test first. | Adjust pH or nutrients before planting to avoid stunted growth or disease. |
Wrapping up and next steps
Planting trees and shrubs for year-round privacy is a rewarding project that blends strategy, patience, and beauty. By choosing the right species, spacing them thoughtfully, and maintaining them well, you’ll create a lush, functional landscape that thrives in every season. 🌿✨
Ready to transform your outdoor space? Start small—pick one section of your property, research the best plants for your climate, and begin planting with confidence. Your future privacy oasis is just a shovel’s throw away!