
Pruning
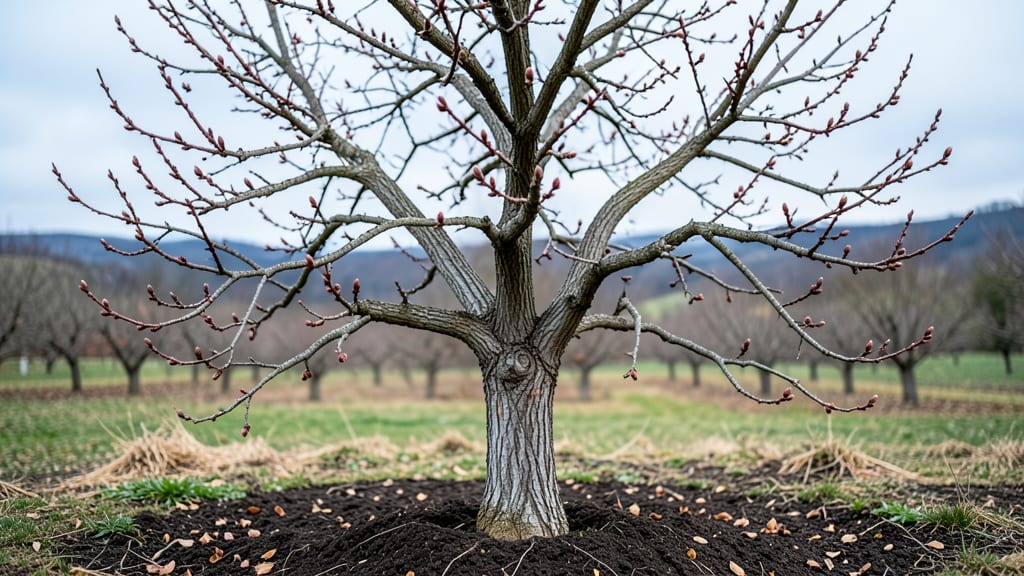
Winter pruning almond trees unlocks their best spring growth—here’s how to do it right. ✂️ I’ve seen firsthand how a few strategic cuts in the dormant season transform a tangled mess into a productive framework for next year’s harvest.
The key is timing: prune after leaf drop but before buds swell, usually between January and February in most climates.
You’ll need sharp pruning shears, a ladder (for taller trees), and a clear day to work. Focus on removing dead, diseased, or crossing branches first—these steal energy from healthy growth. Then thin out crowded limbs to improve airflow, which prevents fungal issues.
Think of it like giving your tree a haircut: less is more, and every cut should open space for sunlight to reach the center.
What you’ll end up with is a tree that bursts into life come spring, with stronger branches and more energy for nut production. The buds will look plump and ready, and you’ll notice fewer broken limbs after heavy winter rains.
This is the foundation for a bountiful harvest—and the satisfaction of shaping a tree that will feed you for decades.
For Mediterranean climates, prune slightly later (February-March) when frost risk drops. In colder regions, avoid pruning too late—wait until buds show color but haven’t yet opened. Either way, the goal is the same: a tree that wakes up strong and ready to grow.
📚 In This Guide
- What you need
- Instructions
- Tips and common mistakes
- Wrapping up and next steps
What you need
- ● Pruning shears: Bypass pruners (sharp, 6-8" blades) for small branches (💡 Invest in high-quality, rust-resistant tools!).
- ● Loppers: 1 pair (8-10" cutting capacity) for medium branches (2"–4" thick).
- ● Pruning saw: 1 curved-tooth saw for thick branches (4"+ diameter).
- ● Disinfectant: 70% isopropyl alcohol or a 10% bleach solution (1 part bleach to 9 parts water) to sterilize tools between cuts.
- ● Gloves: Heavy-duty, cut-resistant gloves (1 pair) for protection.
- ● Ladder or step stool: Sturdy and tall enough to reach the tree’s canopy safely.
- ● Rags or paper towels: For cleaning tools and wiping sap.
- ● Trash bags or bucket: For collecting pruned branches (1–2 large bags).
- ● Permanent marker: To label branches if grafting or identifying scion wood is planned.
- ● Pruning sealant: (e.g., tree wound dressing) for large cuts (3"+ diameter) to prevent disease entry.
- ● Extension pole: For reaching high branches without a ladder.
- ● Sharpener: A file or honing tool to keep blades razor-sharp.
- ● Notebook & pencil: To sketch the tree’s structure before/after pruning.
- ● Safety glasses: To protect eyes from debris.
Step-by-step instructions for almond tree winter pruning
Here's the method I've used for years to wake up my almond trees stronger each spring.
✂️ Step 1: Inspect and Plan Your Cuts
Start by examining your almond tree while it's completely dormant—this is when you'll spot every dead, diseased, or crossing branch clearly. I like to do this on a dry, sunny winter day when branches are easier to see. Look for branches that rub against each other (crossing limbs), grow inward (toward the center), or show signs of disease like cankers or fungal growth.
Make a mental note of branches you want to remove—this prevents over-pruning in one session. Almond trees can handle about 20-30% of their canopy removed in winter, but never take more than one-third in a single year. Grab a small notepad and sketch a quick map of your tree's structure to visualize the final shape.
🌿 Step 2: Remove Dead, Diseased, and Problem Branches
Begin by cutting out any dead or diseased wood first—this prevents spreading problems to healthy branches. Use clean, sharp pruning shears for cuts smaller than ½ inch in diameter, and a pruning saw for thicker branches. Always cut just outside the branch collar (the swollen area where the branch meets the trunk) at a 45-degree angle to prevent water from pooling.
Next, remove crossing branches by cutting the smaller one at its base. For branches growing inward, make your cut just above an outward-facing bud. This encourages new growth in the right direction. I always step back after each cut to check the tree's balance—you want an open center that lets sunlight reach all branches.
☀️ Step 3: Thin the Canopy for Airflow and Light
Thinning is where you create space between branches to improve airflow and sunlight penetration. Select branches that are too close together and remove every other one, starting with the smaller or weaker branch. Aim to leave 6-12 inches of space between branches on mature trees—this prevents future crowding and disease.
Pay special attention to the lower branches. If they're shading the ground too much, they'll compete with the tree's main structure. Remove about one-third of the lower branches to redirect energy to fruit production higher up. You'll know you've done enough when you can see light filtering through the canopy.
⏰ Step 4: Shape the Tree for Future Growth
Now's the time to refine your tree's shape, focusing on an open-center form that's ideal for almonds. Start by selecting 3-5 strong, well-spaced scaffold branches (the main branches that form the tree's framework) and remove any competing branches that grow from the trunk below them. These "water sprouts" steal energy from fruit production.
For the scaffold branches themselves, cut back any branches that grow straight up—these rarely produce fruit and create weak crotches. Instead, encourage outward and slightly upward growth by making cuts just above a bud that faces the direction you want new growth to go. Step back often to visualize how the tree will fill out in spring.
🪴 Step 5: Clean Up and Protect the Tree
After pruning, remove all cut branches from the area immediately. Leaving them on the ground can harbor pests and diseases that will reinfect your tree. I like to bag the debris and dispose of it in yard waste—never compost pruned wood from fruit trees.
Finally, apply a wound dressing to larger cuts (over 1 inch in diameter) to protect against fungal infections. While modern research shows wound dressing isn't always necessary, I still use it on my older trees as a precaution. Water the base of the tree deeply after pruning to help it recover and prepare for spring's new growth.
Tips & tricks for perfect almond tree winter pruning
Winter pruning transforms your almond tree from a tangled mess into a productive powerhouse—here's how to avoid the most common mistakes.
Tool Prep: Sharpen your pruning shears and saw before you start—dull tools crush branches instead of making clean cuts. I test mine on a scrap piece of wood first; if it doesn't slice through cleanly, it's not ready. Clean tools also prevent spreading disease between cuts. Disinfect with rubbing alcohol between each major cut on diseased branches.
Visualization Technique: Step back every 5-10 cuts to check your tree's balance. I use the "cup of tea" test—imagine sunlight filtering through the branches like light through a teacup. If you can't see light through the center, you need to thin more. This open-center approach prevents future crowding and improves fruit production by letting sunlight reach all branches.
Branch Selection Strategy: When choosing which branches to remove in Step 3, prioritize these three things:
- branches growing inward,
- crossing limbs, and
- branches that don't form part of your scaffold structure. I mark them with colored tape first to avoid second-guessing mid-prune. Remember, you're creating space for airflow and light penetration, not just making random cuts.
Post-Prune Recovery: After finishing, give your tree a deep watering—about 10 gallons for a mature tree—to help it recover from the stress of pruning. I always schedule this for late afternoon to reduce evaporation. This is especially important if you've removed more than 20% of the canopy, as the tree will need extra moisture to support new growth in spring.
Pro Tips for Almond Tree Winter
- Winter pruning transforms your almond tree from a tangled mess into a productive powerhouse—here's how to avoid the most common mistakes.
- Tool Prep: Sharpen your pruning shears and saw before you start—dull tools crush branches instead of making clean cuts.
- Visualization Technique: Step back every 5-10 cuts to check your tree's balance.
Frequently asked questions
Got questions about winter pruning your almond tree? You’re not alone! Here are some of the most common concerns—and straightforward answers—to help you trim with confidence.
When exactly is the best time to prune an almond tree in winter?
The ideal window is late winter (January–February in most U.S. zones), when the tree is fully dormant but before new growth starts. Aim for 3–4 weeks after the last hard frost—this ensures you avoid damaging tender buds. If you’re in a mild climate (like California), prune before bud break, typically December–January.
What if I missed the winter pruning window? Can I still trim my almond tree?
Yes, but with caution! Light pruning (removing dead or diseased branches) can happen anytime. However, avoid heavy structural cuts after late spring—this stresses the tree and risks disease. If you’re late, focus on sanitation (removing suckers or crossing branches) and save major shaping for next winter.
How do I know if I’ve pruned too much? Signs to watch for?
Over-pruning shows up as stunted growth, fewer blossoms, or even dieback (dead branches). A good rule: Never remove more than 25% of the tree’s canopy in one year. If you’ve cut back aggressive branches (like water sprouts), you’re likely fine—but if the tree looks skeletal, ease up next time!
Can I prune an almond tree in winter if it’s young (under 5 years old)?
Young trees benefit most from winter pruning to establish a strong structure. Focus on:
- Removing competing branches (those growing inward or crossing).
- Opening the canopy for sunlight and airflow.
- Avoiding the central leader (main trunk) unless it’s damaged.
What should I do if my almond tree’s branches are already dead or diseased?
Act fast! Dead or diseased wood (blackened, oozing, or with fungal spots) should be cut back to healthy tissue—at least 6–12 inches below the damage. Dip tools in rubbing alcohol or a 10% bleach solution between cuts to prevent spread. Dispose of infected branches in the trash (not compost)—never leave them on the ground.
Pro Tip: Label your cuts!
Use masking tape to mark branches you’re unsure about. Revisit them in 6–8 weeks—if they’re still dead, remove them. If they’re alive, you’ve avoided unnecessary pruning!
Wrapping up and next steps
Winter is the perfect time to shape your almond tree’s future—and with the right pruning techniques, you’re setting the stage for a bountiful spring harvest! 🌱 By removing dead wood, thinning dense branches, and encouraging airflow, you’re not just tidying up; you’re investing in healthier growth, better yields, and a tree that thrives for years to come. Don’t wait—grab those shears and get pruning!
Ready to take it further? Next, research almond tree varieties that suit your climate or consider consulting local agricultural extensions for tailored advice. Your tree (and future snacks!) will thank you. 😊