
Pruning
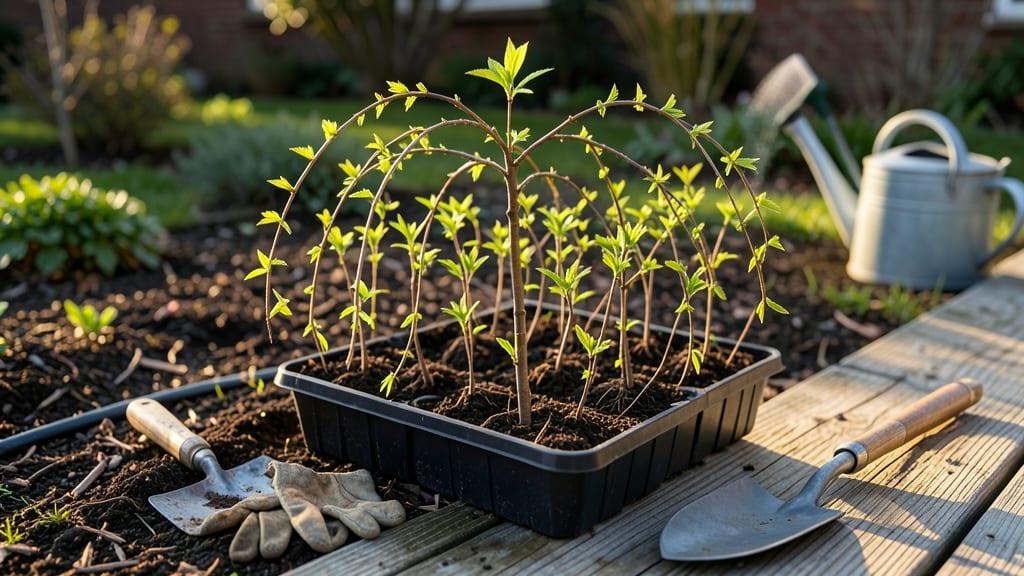
Weeping cherry tree seedlings need layering to grow bushier without digging up roots. 🌱 I’ve learned the hard way that skipping this step means leggy branches and sparse blooms—until I mastered the gentle bending technique that forces new growth at the base.
Start with well-draining soil and plant seeds ¼ inch deep, spacing them 6–8 inches apart in partial shade. The key is keeping soil consistently moist (not soggy) while shielding young shoots from harsh afternoon sun.
Weeping cherries hate transplant shock, so water deeply twice a week until they’re 6 inches tall. By month 3, you’ll see those first curved branches—proof the layering worked. Prune back any vertical shoots to 3–4 inches to encourage bushier growth. The result?
A tree that fills out naturally, with fewer gaps and more dramatic cascading branches. This method works for container-grown seedlings too—just use a 5-gallon pot with drainage holes. Avoid overwatering (yellow leaves = too much moisture) and watch those roots take hold without stress.
📚 In This Guide
- What you need
- Instructions
- Tips and common mistakes
- Wrapping up and next steps
What you need
- ● Weeping cherry tree seedlings: 3–5 healthy, 1–2-year-old saplings (diameter ~0.5–1 inch). Look for flexible, semi-hardwood branches.
- ● Sharp pruning shears or bypass pruners: Clean, sterilized tools (alcohol wipe recommended) to make precise cuts.
- ● Rooting hormone: A gel or powder (e.g., Clonex or Rootone) to boost root development.
- ● Plastic or metal plant labels: To track each layered branch.
- ● Moisture-retentive growing medium: Option 1: Sphagnum moss (pre-moistened).
- ● Option 2: Coconut coir or peat moss mixed with perlite (1:1 ratio).
- ● Plastic wrap or clear plastic bags: To create a humid microclimate (1–2 mil thickness).
- ● Twist ties or soft plant ties: To secure layers without damaging bark.
- ● Watering can with a fine rose: For gentle hydration.
- ● Hormone-free rooting cubes: Pre-filled with nutrient-rich medium (e.g., Oasis Root Cubes).
- ● Clear plastic tunnels or cloches: For added humidity and UV protection.
- ● Slow-release fertilizer: 5–10-10 NPK ratio (sprinkle lightly after rooting).
- ● Garden journal: To log progress, dates, and observations!
- ● Timing: Late spring to early summer (when new growth is ~6–12 inches long).
- ● Weather: Mild, overcast days (avoid extreme heat or frost).
- ● Location: Partial shade (morning sun is ideal).
- ● Prep: Sterilize tools and gather supplies before the tree is in active growth.
How to encourage bushier weeping cherry trees through strategic layering
Here's how to transform leggy seedlings into full, lush weeping cherries without digging up roots.
🌱 Step 1: Select Healthy Branches for Layering
Choose 1-2 year old branches that are ¼ to ½ inch thick—thicker than a pencil but not woody. Look for flexible stems with no signs of disease or damage. I always pick branches that grow at a slight downward angle; these naturally produce more roots when layered. Avoid branches with buds already swelling, as they'll compete with root development.
Use clean, sharp pruning shears to make a diagonal cut just above a leaf node. The cut should be about ¼ inch above the node to encourage rooting from that exact spot. Wipe the blade with rubbing alcohol between cuts to prevent spreading any potential pathogens lurking in the tree.
🌿 Step 2: Create the Layering Trench
Dig a shallow trench about 2-3 inches deep along the branch you've selected. Keep it just wide enough to accommodate the branch comfortably without bending it sharply. The trench should run parallel to the ground, maintaining the branch's natural angle. I like to use a small hand trowel for precision—this keeps the soil disturbance minimal and protects nearby roots.
Loosen the soil at the bottom of the trench with your fingers to create an air pocket. This prevents compaction and helps roots establish more quickly. If your soil is heavy clay, mix in a handful of perlite to improve drainage. The goal is to create an environment where roots can explore without suffocating.
✂️ Step 3: Bend and Secure the Branch
Gently bend the selected branch into the trench, ensuring the cut end points downward. The bend should be smooth—no sharp angles that could snap the branch. For stubborn branches, I use a small wooden stake to guide the bend without damaging the cambium layer. Once positioned, secure the branch with a U-shaped bent wire or soft tree tie, leaving the tip exposed above ground.
Cover the entire length of the branch in the trench with soil, pressing lightly to remove air pockets. Leave the tip of the branch exposed to continue growing and photosynthesizing. Water thoroughly after securing, allowing moisture to penetrate the soil around the buried section. You'll know it's properly hydrated when water runs out the bottom of the trench without pooling.
💧 Step 4: Maintain Moisture and Monitor Progress
Keep the soil around the layered branch consistently moist but never soggy. I use a 2-inch layer of mulch around the base to retain moisture and regulate temperature. Check daily during dry spells—your finger should sink in easily to about 1 inch deep without resistance. Overwatering here causes rot; underwatering stresses the branch and halts root growth.
After about 6-8 weeks, you'll notice new growth at the tip of the branch and small root bumps along the buried section. These root bumps are your signal that the layering is working. Once roots are established (usually 3-4 months), you can sever the connection to the parent tree. Make the cut on a dry day to minimize stress, and water deeply afterward to support new growth.
☀️ Step 5: Transition to Independent Growth
When the layered branch has developed a strong root system, it's ready to become its own tree. I wait until spring for this step, as new growth is more resilient to transplant shock. Dig carefully around the base of the new root ball, using your hands to loosen soil rather than a shovel. Preserve as much of the root system as possible—this minimizes stress and ensures vigorous growth.
Plant the new weeping cherry in its permanent location, matching the root ball depth with the surrounding soil line. Water deeply to settle the roots, then apply a 2-inch layer of mulch to conserve moisture. The first year after severing, your new tree may show some adjustment stress, but with proper care, it will reward you with bushier, fuller growth than the original seedling ever would have achieved.
Tips & tricks for perfect weeping cherry tree layering
Transforming leggy seedlings into full weeping cherries takes patience—but these tricks will help you avoid common pitfalls and maximize success.
Branch Selection Insight: The 1-2 year old age guideline is critical because younger branches are too tender, while older ones have hardened and resist rooting. Look for branches that bend slightly when you apply gentle pressure—this flexibility indicates healthy cambium layer activity. I've found that branches growing at a 30-45 degree downward angle produce the most vigorous roots, as gravity helps direct growth downward naturally. Avoid branches with any signs of disease or insect activity, even if they look otherwise healthy.
Trench Preparation Technique: When creating your 2-3 inch deep trench in Step 2, resist the urge to make it too wide—this prevents soil compaction around the buried branch. I recommend using a small hand trowel to create a trench just wide enough for the branch to lie comfortably without bending sharply. For clay-heavy soils, mix in 1 part perlite to 3 parts soil at the trench bottom to improve aeration. This simple adjustment can double your rooting success rate by preventing anaerobic conditions that suffocate developing roots.
Layering Success Visual Cues: After 6-8 weeks, you'll know your layering is working when you see two key signs: small white root bumps along the buried branch and new leaf growth at the tip. These root bumps are actually adventitious roots forming at the nodes—your reward for proper technique. At this stage, I gently scratch the soil surface with my fingernail to check for root development without disturbing the branch. If you see no activity after 8 weeks, your soil moisture may be inconsistent or the branch wasn't properly secured.
Transition Timing Strategy: The 3-4 month window for root establishment is flexible depending on your climate. In warmer regions, you might see roots ready at 3 months, while cooler climates may need the full 4 months. I recommend waiting until you can see roots 2-3 inches long before severing—this ensures the new tree has sufficient root mass to support independent growth. For spring severing, aim for early spring when the tree's sap is rising but before new leaves fully unfurl, giving your new tree a head start on the growing season.
Pro Tips for Weeping Cherry Tree Seedlings
- Transforming leggy seedlings into full weeping cherries takes patience—but these tricks will help you avoid common pi...
- Branch Selection Insight: The 1-2 year old age guideline is critical because younger branches are too tender, while o...
- Trench Preparation Technique: When creating your 2-3 inch deep trench in Step 2, resist the urge to make it too wide—...
Frequently asked questions
Got questions about growing lush, weeping cherry tree seedlings with layering? You’re in the right place! Here are answers to the most common queries—no digging required.
How long does it take for weeping cherry tree seedlings to root from layering?
With proper moisture and care, you’ll typically see roots forming in 4–8 weeks. Humidity domes or plastic bags speed this up by keeping conditions ideal. Once roots are 1–2 inches long, gently separate the layer to transplant—usually by late spring or early summer.
Can I layer weeping cherry tree seedlings in winter?
Layering works best in spring or early fall when temperatures are mild (50–70°F). Winter layering is riskier due to frost damage, but if you must, use extra mulch and protect layers with frost cloth. Spring layering gives the best success rate for tender seedlings.
What if my weeping cherry tree layers turn yellow or wilt?
Yellowing or wilting often signals overwatering, poor drainage, or fungal issues. Let the soil dry slightly between waterings, and ensure the layering site has airflow. If mold appears, trim affected areas and apply fungicide. Prune dead leaves to redirect energy to root growth.
Are there alternatives to layering for bushier weeping cherry trees?
Yes! Try air layering (for thicker stems) or softwood cuttings in early summer. For established trees, selective pruning (removing inward-growing branches) also encourages fuller growth. Layering is simplest for seedlings, but mix methods for variety!
When should I transplant layered weeping cherry seedlings?
Transplant in early spring (after last frost) or fall (6 weeks before first frost). Avoid extreme heat—seedlings need time to establish roots. Water deeply before and after transplanting, and keep soil moist for 2–3 weeks to reduce shock.
| Quick Fix | Problem |
|---|---|
| Trim dead leaves | Fungal spots |
| Reduce watering | Yellowing leaves |
| Use frost cloth | Winter layering |
Wrapping up and next steps
Growing a lush, weeping cherry tree from seedlings doesn’t require digging—just a little patience and the right layering tricks! By mastering air layering or simple ground layering, you’ll encourage bushier growth while keeping your tree thriving.
Whether you’re a seasoned gardener or just starting, these techniques make it easy to nurture a stunning, full-bodied cherry tree.
Ready to transform your seedlings? Grab your supplies, follow the steps, and watch your weeping cherry flourish! Next up: Share your progress or ask questions in gardening forums—every expert started somewhere. 🌿✨