
Propagation
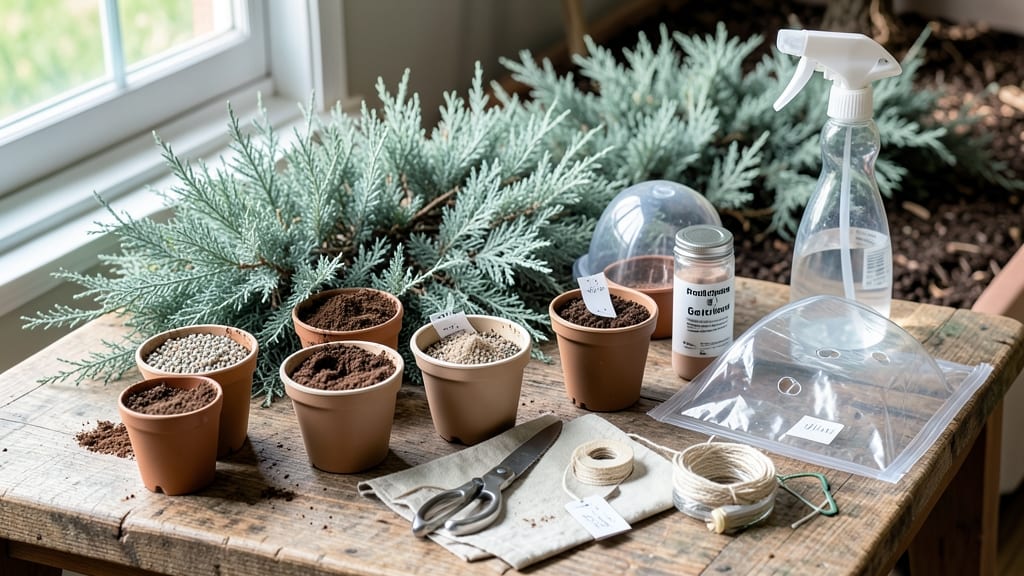
Layering juniper tree propagation gives you new trees without digging up the parent plant. ✨ I’ve propagated my blue rug juniper this way for years, and it’s the secret to filling bare spots in the landscape without breaking the bank.
The key is patience—it takes 6-12 months for roots to form—but once established, these new plants thrive with the same hardy resilience as their parent. You’ll need sharp pruners, rooting hormone (optional but helpful), and a damp but well-draining mix of sand and peat.
Start in early spring when new growth is just beginning. Bend a low-hanging branch to the ground, make a small cut, and secure it with a U-shaped wire or rock. Keep the soil consistently moist but never soggy, and you’ll see roots develop before the next growing season.
This method works for all juniper varieties, from upright columnars to sprawling ground covers. The best part? You get a genetically identical plant with zero risk of transplant shock—just like cloning, but way easier.
📚 In This Guide
- What you need
- Instructions
- Tips and common mistakes
- Wrapping up and next steps
What you need
- ● Mature Juniper Tree: A healthy, non-flowering branch (preferably 1–2 years old) with some flexibility.
- ● Sharp Pruning Shears or Bypass Pruners: Clean, sterilized tools to make precise cuts (avoid dull blades!).
- ○ Rooting Hormone (Optional but Helpful): A powder or gel (e.g., Rootone or Clonex) to boost root growth.
- ● Plastic or Rubber Strip: A 1–2 inch wide strip (e.g., plastic plant tie) to secure the layer.
- ● Moisture-Retentive Medium: Option 1: Sphagnum moss (kept damp but not soggy).
- ● Option 2: Perlite or vermiculite (for aeration).
- ● Clear Plastic Bag or Humidity Dome: To maintain humidity around the layer (e.g., a ziplock bag with holes).
- ● Garden Twine or Zip Ties: For securing the plastic bag in place.
- ● Small Trowel or Spade: For digging a shallow trench (if layering in soil).
- ● Watering Can with Fine Nozzle: For gentle, even moisture application.
- ● Hormone-Free Alternative: Cinnamon powder (natural antifungal) for cuts.
- ● Heat Mat: Speeds up rooting in cooler climates (set to 70–75°F).
- ● Grow Lights: If propagating indoors (12–14 hours/day).
- ● Label Tags: To track propagation dates and varieties.
Step-by-Step juniper tree propagation using layering
Here’s how to grow new juniper trees from existing ones without digging up roots—just patience and a few simple tricks.
🌿 Step 1: Select and Prepare the Parent Juniper
Choose a healthy, mature juniper with flexible, green stems about ¼ to ½ inch thick. These are ideal for layering because they’re strong enough to support new root growth but still pliable. Look for branches that naturally bend toward the ground—this makes the process easier and more successful.
In late spring or early summer, when the plant is actively growing, gently bend a low-lying branch down toward the soil. The goal is to create a 45-degree angle without breaking the stem. If the branch is too stiff, you may need to make a small cut on the underside to encourage flexibility. This is the branch that will eventually form roots.
💧 Step 2: Create the Root-Inducing Environment
Once the branch is bent into position, carefully remove a small section of bark—about 2-3 inches long—on the underside of the stem. This exposes the cambium layer, which is where new roots will form. Use a sharp knife or pruning shears to make a clean cut, but don’t go too deep; you’re just scratching through the outer layer.
After exposing the cambium, cover the wounded area with rooting hormone powder (optional but helpful for faster results). Then, secure the branch to the ground using a U-shaped wire or bendable stake, pinning it down so it stays in contact with the soil. This ensures the exposed cambium stays buried and moist, which triggers root development.
☀️ Step 3: Monitor Moisture and Growth Conditions
Keep the soil around the layered branch consistently moist but not soggy. Water lightly every 2-3 days until you see new growth, then adjust based on rainfall. Juniper roots form best in well-draining soil with partial shade, so avoid direct afternoon sun, which can dry out the area too quickly. You’ll know it’s working when you see new shoots or leaves emerging from the layered section in 4-8 weeks.
Check the buried section every 2 weeks for signs of root formation. Gently brush away a little soil to peek—if you see small white roots or a slight swelling, the layering is successful. If not, give it more time or adjust the moisture level. Patience is key here; some junipers take longer to root than others.
✂️ Step 4: Separate and Transplant the New Juniper
Once the layered branch has developed a strong root system—usually after 12-18 months—it’s time to separate it from the parent plant. Use clean pruning shears to cut the stem just above the new roots, ensuring you don’t damage the original plant. Handle the new cutting carefully to avoid breaking the delicate roots.
Transplant the rooted layer into its permanent location, ensuring the soil line matches what it was accustomed to. Water deeply after planting to help it establish. The first year after transplanting, keep the soil moist and protect the young juniper from extreme heat or cold. With proper care, your new juniper will grow into a thriving tree.
Tips & tricks for perfect juniper tree layering
Don't let hesitation stop you—these practical tips will turn your layering attempt into a successful propagation.
Branch Selection Wisdom: When choosing your ¼ to ½ inch thick stems in Step 1, look for branches that are slightly younger than mature wood—they're more flexible and respond better to layering. I've found that branches with a slight curve already are perfect candidates, as they naturally bend toward the ground. Avoid branches that are too woody or brittle, as they won't develop roots effectively. The key is finding that sweet spot where the branch is sturdy enough to support new growth but still pliable enough to bend without breaking.
Timing Secret: The late spring to early summer window mentioned in Step 1 is critical because this is when junipers experience their most active growth period. The plant's natural energy helps accelerate root development in your layered branch. If you're in a region with mild winters, you can also try layering in early fall, but spring is always my first choice. I've noticed that branches layered in summer often show signs of root formation within 4-8 weeks—that's when you'll start seeing those exciting new shoots emerge!
Rooting Hormone Strategy: While rooting hormone powder is optional in Step 2, I've found it dramatically increases success rates—especially if you're working with particularly stubborn junipers. Simply dip the exposed cambium area into the powder before securing it to the ground. For even better results, I like to make a small vertical cut (about ¼ inch deep) along the exposed area before applying the hormone. This creates more surface area for root development without damaging the branch. Just remember to keep everything moist after application.
Moisture Management: The 2-3 days watering schedule in Step 3 is a great starting point, but don't be afraid to adjust based on your local climate. In hot, dry conditions, you might need to water every 1-2 days to maintain that crucial moisture level. I've learned the hard way that soggy soil is just as bad as dry soil—always check the moisture by sticking your finger about an inch into the soil. It should feel damp but not wet. A good trick is to create a small depression around the layered branch to help collect water during irrigation.
Pro Tips for Juniper Tree Propagation
- Don't let hesitation stop you—these practical tips will turn your layering attempt into a successful propagation.
- Branch Selection Wisdom: When choosing your ¼ to ½ inch thick stems in Step 1, look for branches that are slightly yo...
- Timing Secret: The late spring to early summer window mentioned in Step 1 is critical because this is when junipers e...
Frequently asked questions
Got questions about propagating your juniper tree? You’re not alone! Here are some of the most common concerns—plus straightforward answers to help you succeed.
Can I propagate juniper from cuttings in winter?
While possible, winter isn’t the best time for juniper propagation. Cuttings root more successfully in spring or early summer when the plant is actively growing. If you must try winter, use a heated propagation mat and keep humidity high to mimic ideal conditions.
How long does it take for juniper cuttings to root?
Patience is key! Juniper cuttings typically take 4–12 weeks to root, depending on species, humidity, and temperature. Check for resistance at the base of the cutting—if it feels firm, roots are likely forming. Avoid disturbing them until new growth appears.
What’s the easiest juniper species to propagate?
For beginners, ‘Blue Rug’ juniper or ‘Sargentii’ juniper are excellent choices—they root readily from softwood cuttings. Hardier species like ‘Common Juniper’ may require more patience but are still manageable with the right technique.
Why are my juniper cuttings rotting?
Overwatering or poor drainage is usually the culprit. Juniper cuttings prefer moist (not soggy) soil and benefit from a bottom-heavy watering approach—place the pot in a tray of water instead of pouring from above. Ensure your propagation mix is well-draining (e.g., perlite + sand).
Can I reuse old juniper cuttings that didn’t root the first time?
Yes! If the cutting is still healthy (no mold or mushy stems), trim the bottom ½ inch and try again. Some junipers are stubborn—give them a second chance with fresh rooting hormone and a clean pot. Just avoid reusing cuttings that’ve been sitting for months.
Wrapping up and next steps
Propagating a juniper tree through layering is a rewarding way to expand your garden without the stress of digging—just patience and a little know-how! 🌱 Whether you’re a beginner or a seasoned gardener, this method offers a simple, cost-effective way to grow new plants from existing ones.
With the right timing and care, you’ll soon enjoy lush, thriving junipers that mirror their parent’s beauty.
Ready to put your new skills to the test? Pick a sunny spot in your yard and start layering today—your future juniper grove awaits! For extra confidence, document your progress with photos to track growth over time. Happy gardening! 🌿