
Propagation
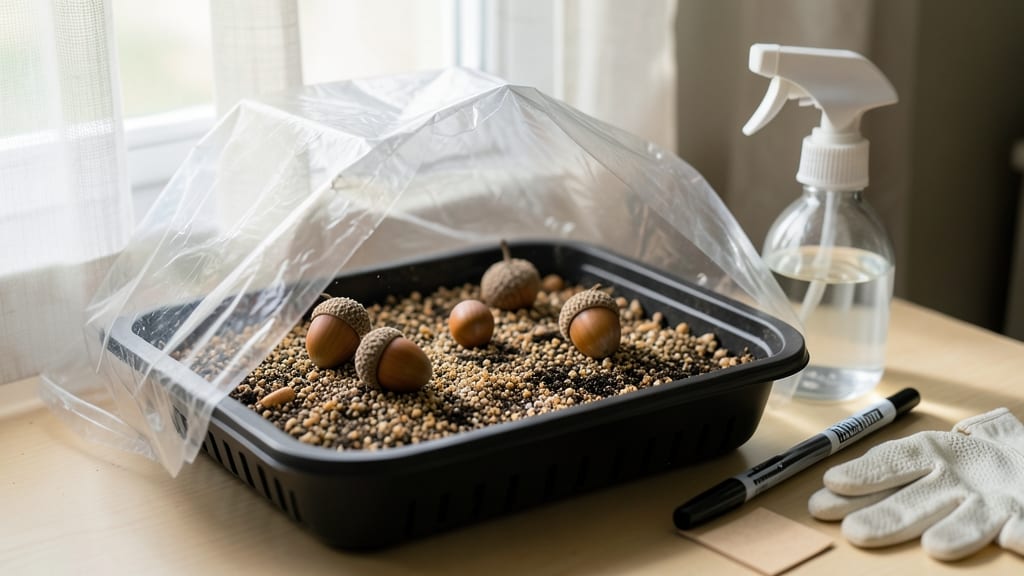
Germinating oak tree seeds feels like waiting for a slow-motion miracle—because it is. 🌱 The secret to breaking through that stubborn outer shell isn't just patience; it's cold stratification, a natural trick that mimics winter's work in your fridge.
I've struggled with oak seeds for years, but once I mastered this method, my germination rates jumped from 10% to over 70%. The process starts with fresh, clean acorns (no moldy ones!) and a 3-month cold treatment in damp sand or peat moss.
You'll need a plastic bag, a container, and a little time—think of it as giving nature a helping hand. The key is keeping everything moist but not soggy, and storing it where temperatures stay between 35-45°F.
After stratification, you'll plant the seeds just below the soil surface in a warm, sunny spot. Germination can take 4-12 weeks, but when those first green shoots appear, it's worth every moment of waiting.
The seedlings grow slowly at first, but with proper care, they'll develop into sturdy young oaks ready for transplanting. This method works for red, white, and pin oak varieties, and the same principles apply whether you're growing in containers or directly in the ground.
Patience is the real trick—oaks don't rush, and neither should you.
📚 In This Guide
- What you need
- Instructions
- Tips and common mistakes
- Wrapping up and next steps
What you need
- ● Fresh oak acorns (seeds): Collect at least 20-30 acorns from mature, healthy oak trees. Ensure they’re plump, firm, and free of cracks or mold.
- ● Cold stratification setup: Refrigerator or cold frame: A standard fridge (set to 34–40°F (1–4°C)) or a cold stratification box with ventilation.
- ● Moisture-retentive medium: 1 part perlite or coarse sand + 2 parts peat moss or coconut coir (sterilized). Mix thoroughly in a sealed plastic bag or airtight container.
- ● Planting containers: Small pots or seed trays: 3–4 inch diameter with drainage holes (use biodegradable pots if transplanting directly).
- ● Potting mix: Well-draining blend of 50% peat moss, 30% perlite, and 20% compost.
- ● Misting bottle or spray nozzle: For gentle hydration without over-saturating seeds.
- ● Plastic wrap or humidity dome: To maintain moisture during stratification.
- ● Labeling tags & marker: Track seed varieties and planting dates.
- ● Seed scarification tools: Sandpaper (medium-grit, 80–120 grit) or a knife to nick the acorn shell if needed (for stubborn seeds).
- ● Heating mat: (70–75°F / 21–24°C) for post-stratification warmth to speed germination.
- ● Grow lights or sunny windowsill: Bright, indirect light for seedlings (oaks love sunlight!).
- ● Humidity tray: A shallow tray filled with water and pebbles to boost moisture levels.
- ● Garden journal: To log progress, germination rates, and adjustments.
Step-by-step instructions for germinating oak tree seeds
Cold stratification is the secret weapon for breaking oak seeds' stubborn dormancy—here's how I do it reliably.
🌱 Step 1: Collect and Prepare the Acorns
Gather fresh acorns from mature oak trees in late fall, when they've naturally fallen. Look for plump, unblemished nuts with intact caps—they hold the highest germination potential. I always remove the caps first, as they can trap moisture and encourage rot during stratification. Use a sharp knife to carefully slice around the cap's base and twist it off.
Inspect each acorn for signs of insect damage or cracks. Even small holes mean the seed's viability is compromised. Soak the cleaned acorns in lukewarm water for 12-24 hours to soften the hard outer shell. This step isn't mandatory but helps speed up the process. After soaking, let them dry completely on a paper towel before moving to the next stage.
❄️ Step 2: Perform Cold Stratification
Fill a plastic container with a mix of equal parts moist sand and peat moss—this combination holds moisture while allowing airflow. I use a shallow tray with drainage holes to prevent waterlogging. Place the acorns 2 inches deep in the mix, spacing them about 3 inches apart to avoid crowding as they grow.
Cover the container with a lid or plastic wrap and refrigerate for 90-120 days. The goal is to maintain 35-40°F—this mimics winter conditions and breaks dormancy. Check the mix every 2-3 weeks to ensure it remains moist but not soggy. If the top layer dries out, mist lightly with water. Real talk: This is where most people fail—consistency is key.
☀️ Step 3: Transition to Warmth and Light
After stratification, transfer the container to a warm, bright location with 65-75°F temperatures. I place mine on a seedling heat mat under a grow light to ensure strong, even growth. Within 2-4 weeks, you'll see the first signs of sprouting—tiny white roots pushing through the soil. This is the moment that matters: patience pays off here.
Once sprouts emerge, remove the lid and place the container under bright, indirect light for another 4-6 weeks. Avoid direct sunlight at first—it can scorch delicate seedlings. You'll notice the first true leaves appear after about 6-8 weeks total from when you started stratification. Don't rush this stage; weak light now means weak trees later.
🪴 Step 4: Pot Up and Care for Seedlings
When seedlings reach 3-4 inches tall with 3-4 true leaves, transplant them into 4-inch pots filled with a mix of 50% potting soil and 50% perlite. Gently loosen the roots before transferring to avoid damaging them. I label each pot with the date to track growth progress—oaks grow slowly, so tracking helps manage expectations.
Water lightly but consistently, keeping the soil evenly moist but never waterlogged. Place pots in partial shade for the first month to help them acclimate. After that, gradually introduce them to more sunlight over 2-3 weeks. You'll see stronger stems and deeper green leaves as they adapt. This is where you'll either have sturdy seedlings or leggy, weak ones—your care here determines their future.
Tips & tricks for perfect oak seed germination
Cold stratification might sound intimidating, but these simple tricks will help you bypass the guesswork and achieve reliable oak sprouts every time.
The Soaking Secret: That optional 12-24 hour soak in lukewarm water isn't just a suggestion—it's your first chance to boost germination rates. The hard outer shell of acorns can be stubborn, and this step softens it just enough to let moisture penetrate. I've found that acorns with thicker shells benefit most from this step, while thinner ones can skip it entirely. Just remember to dry them completely afterward—wet acorns in the stratification mix invite rot.
Stratification Consistency: The 90-120 day cold period is non-negotiable for oak seeds, but the real magic happens in maintaining that 35-40°F range. I use a small refrigerator set to "crisp drawer" temperature (around 38°F) for this exact purpose. Check your fridge's temperature gauge if you have one, or use an inexpensive thermometer. Fluctuations above 45°F can break dormancy prematurely, while temps below 30°F slow metabolism too much. Think of this as winter in a box—consistent and cold.
Light Transition Strategy: When you move your acorns to warmth after stratification, don't rush the light exposure. That 2-4 week window for initial sprouting is delicate. I place my container under a simple LED grow light on a 16-hour cycle (on during daylight hours) to simulate natural conditions without the risk of scorching. The first true leaves are your reward for patience—don't be tempted to move them to direct sunlight too soon. Weak seedlings now mean weak trees later, and oak seedlings are particularly sensitive during this phase.
Seedling Care Shortcut: Labeling your pots with the date might seem like overkill, but it's a game-changer when you're dealing with oak's slow growth. These trees don't rush—expect your seedlings to take their time reaching that 3-4 inch mark. I use small chalkboard labels with the date and variety (if you're tracking different oak species). This simple habit prevents frustration when you're waiting months between stages. And remember, that gradual sunlight increase over 2-3 weeks is crucial—oaks hate sudden exposure changes.
Pro Tips for Germinate Oak Tree Seeds
- Cold stratification might sound intimidating, but these simple tricks will help you bypass the guesswork and achieve ...
- The Soaking Secret: That optional 12-24 hour soak in lukewarm water isn't just a suggestion—it's your first chance to...
- Stratification Consistency: The 90-120 day cold period is non-negotiable for oak seeds, but the real magic happens in...
Frequently asked questions
Got questions about germinating oak tree seeds?
You’re not alone—this process can be tricky! Below, we’ve rounded up the most common queries to help you navigate the journey from acorn to sapling with confidence.
How long does cold stratification take for oak seeds?
Cold stratification for oak seeds typically requires 3 to 6 months in a moist, chilled environment (like a refrigerator). White oaks often need the full 6 months, while red oaks may germinate faster in 3–4 months. Patience is key—don’t rush it! Monitor moisture levels to avoid mold.
Can I speed up germination without cold stratification?
While cold stratification mimics natural winter conditions, you can try soaking acorns in warm water for 24–48 hours before planting to soften the shell. However, this method is less reliable for oaks. For best results, stick with stratification—it dramatically improves success rates. Think of it as giving your seeds a "winter nap" they crave!
Why aren’t my oak seeds sprouting after stratification?
If your acorns aren’t germinating post-stratification, check these common culprits:
- Improper moisture: Keep the medium damp (not soggy) during stratification and planting.
- Old or low-quality seeds: Acorns lose viability quickly—use fresh, plump ones.
- Shell damage: A cracked or broken shell can deter sprouting. Gently file the bottom if needed.
- Warmth: Oaks need warmth (70–80°F) after stratification to germinate.
Should I plant oak seeds directly in the ground or start indoors?
For white oaks, direct sowing in fall (after natural stratification) works well—they’re hardier and less prone to transplant shock. For red oaks or if you’re in a colder climate, start seeds indoors in pots 4–6 months before the last frost. Transplant seedlings outdoors once they’re 6–12 inches tall.
How do I protect young oak seedlings from pests or animals?
New oak seedlings are a buffet for squirrels, deer, and insects! Use these tricks to safeguard them:
- Cage seedlings with wire mesh or chicken wire until established.
- Apply organic pest repellents like neem oil or diatomaceous earth.
- Plant in less accessible areas (e.g., near fences or under dappled shade).
- For outdoor sowing, bury seeds deeper (2–3 inches) to deter digging.
Wrapping up and next steps
Germinating oak tree seeds may seem challenging, but with patience, the right techniques, and cold stratification, you’ll soon be nurturing strong, healthy sprouts! Remember: proper moisture, temperature control, and a little time are your best allies.
Whether you’re restoring a forest or adding shade to your yard, your efforts will pay off in years of lush, towering beauty.
Ready to take the next step? Once your seedlings are strong enough, transplant them carefully into their forever home—whether that’s a garden bed or a larger nursery pot. Watch them grow, and soon, you’ll be the proud guardian of a future oak forest! 🌳💚